
Tottenham vs Newcastle Tactical Analysis
Table of Contents
There’s a unique crispness to the air on a cup night, especially as autumn deepens into the serious end of the year. You know the feeling. It’s when the floodlights seem to cut through the dark with a little more intensity, the roar of the crowd feels a bit more desperate, and the weight of expectation hangs heavy. For anyone invested in the fortunes of Tottenham Hotspur or Newcastle United, the evening of October 29th, 2025, was exactly that—a litmus test under the lights, a collision of footballing ideals, and ultimately, a stark lesson in the art of tactical execution.
You see, it’s in these midweek battles, nestled between the relentless weekend grind of the Premier League, that the true fabric of a team is revealed. It’s more than just 90 minutes; it’s a signpost for the journey ahead, a moment that can ignite a season with hope or douse it in familiar, nagging frustration. This comprehensive Tottenham vs Newcastle Tactical Analysis is your deep dive into a night where strategy, grit, and clinical precision dictated the narrative at a thunderous St James’ Park.
The story of this EFL Cup fourth-round tie was one of control and conviction. Newcastle United, the defending champions, played with the authority of a team that knows how to win these knockout encounters. They systematically dismantled a Tottenham side that, despite moments of possession, looked bereft of ideas and vulnerable under pressure.
The 2-0 scoreline felt like a fair reflection of the tactical chasm between the two sides on the night. For you, the discerning fan looking to understand the why behind the result, this breakdown will peel back the layers of a fascinating footballing contest. We’ll explore the formations, the key moments, and the individual battles that shaped the outcome, providing a definitive Tottenham vs Newcastle Tactical Analysis of where the game was won and lost.
Match Overview: A Tough Night for Spurs
Your initial glance at the final score—Newcastle United 2, Tottenham Hotspur 0—tells a simple story, but the reality of the match was woven into the tactical nuances employed by both managers. Newcastle, playing on their home turf, demonstrated why they are the reigning EFL Cup holders.
Their performance was a masterclass in controlled aggression and game management, ensuring their progression to the quarter-finals and abruptly ending Tottenham’s aspirations in the competition. This Tottenham vs Newcastle tactical analysis serves as an autopsy of a performance where one team’s plan was executed to near perfection, while the other’s unraveled at critical junctures.
| Match Detail | Information |
| Competition | EFL Cup (Carabao Cup) – Fourth Round |
| Date | October 29, 2025 |
| Venue | St. James’ Park, Newcastle |
| Final Score | Newcastle United 2 – 0 Tottenham Hotspur |
| Goalscorers | Fabian Schär (24′), Nick Woltemade (57′) |
Starting Lineups and Formations: A Clear Tactical Declaration / Tottenham vs Newcastle Tactical Analysis
Before a ball was even kicked, the team sheets offered you a clear window into the minds of Eddie Howe and Thomas Frank. The chosen formations were not just a collection of names and numbers; they were declarations of intent, setting the parameters for the strategic chess match that was about to unfold. Understanding these initial setups is absolutely fundamental to any credible Tottenham vs Newcastle Tactical Analysis.
Newcastle United (4-3-3): Eddie Howe’s selection of a 4-3-3 was an unambiguous statement. You knew immediately that he wanted his side to be the protagonist. This shape is inherently proactive, designed to facilitate a high press, dominate the central areas of the pitch, and unleash a dynamic front three. With Sandro Tonali pulling the strings in midfield and the likes of Anthony Elanga and Harvey Barnes providing pace and width, the Magpies were built to attack and unsettle their opponents from the very first minute.
Tottenham Hotspur (4-2-3-1): In the opposing dugout, Thomas Frank’s decision to deploy a 4-2-3-1 was a more cautious, pragmatic approach. On paper, the double pivot of Pape Matar Sarr and Rodrigo Bentancur was there to provide a protective screen for the back four, a crucial element you’d look for when playing away from home against strong opposition. The intention was to absorb pressure and then use the creativity of players like Xavi Simons and the pace of Brennan Johnson to hit Newcastle on the counter.
It was a reactive setup, designed to be solid first and foremost.
| Newcastle United | Tottenham Hotspur |
| Aaron Ramsdale (GK) | Antonin Kinsky (GK) |
| Emil Krafth | Djed Spence |
| Fabian Schär | João Palhinha |
| Malick Thiaw | Kevin Danso |
| Dan Burn (C) | Pedro Porro |
| Sandro Tonali | Pape Matar Sarr |
| Jacob Ramsey | Rodrigo Bentancur |
| Joe Willock | Lucas Bergvall |
| Anthony Elanga | Xavi Simons |
| Harvey Barnes | Brennan Johnson |
| Nick Woltemade | Richarlison |
First-Half Breakdown: Newcastle’s High-Intensity Approach
If you were watching the first 45 minutes, the pattern of the game became apparent very quickly. It wasn’t a cagey, feeling-out process. Instead, it was an exhibition of one team imposing its will through sheer intensity and tactical discipline, a core finding in this Tottenham vs Newcastle Tactical Analysis.
The Magpies’ Ferocious High Press
From the opening whistle, Newcastle swarmed Tottenham. This wasn’t just aimless running; it was a coordinated, suffocating high press. You could see the triggers: as soon as a Spurs defender like Kevin Danso or João Palhinha received the ball, they were immediately closed down by Newcastle’s front three.
- Key Points:
- The front line of Woltemade, Barnes, and Elanga didn’t just press the center-backs; they cleverly angled their runs to cut off passing lanes to the full-backs, Spence and Porro. This effectively isolated the man on the ball, forcing hurried passes or long, aimless balls forward.
- This initial press was aggressively supported by the midfield trio of Ramsey, Willock, and Tonali. They pushed up, man-marking Spurs’ double pivot and Lucas Bergvall, which completely severed the connection between Tottenham’s defense and attack. You saw Bentancur and Sarr repeatedly receiving the ball facing their own goal, with no time to turn.
- The consequence was a string of early chances for the home side. A powerful header from Malick Thiaw off a corner forced a sharp save from Antonin Kinsky, and a promising drive from Jacob Ramsey was desperately blocked by Pedro Porro. The Tottenham vs Newcastle tactical analysis of this first half is a story of Spurs being unable to find any breathing room or establish any semblance of their desired passing rhythm. They were caught in a tactical straitjacket.
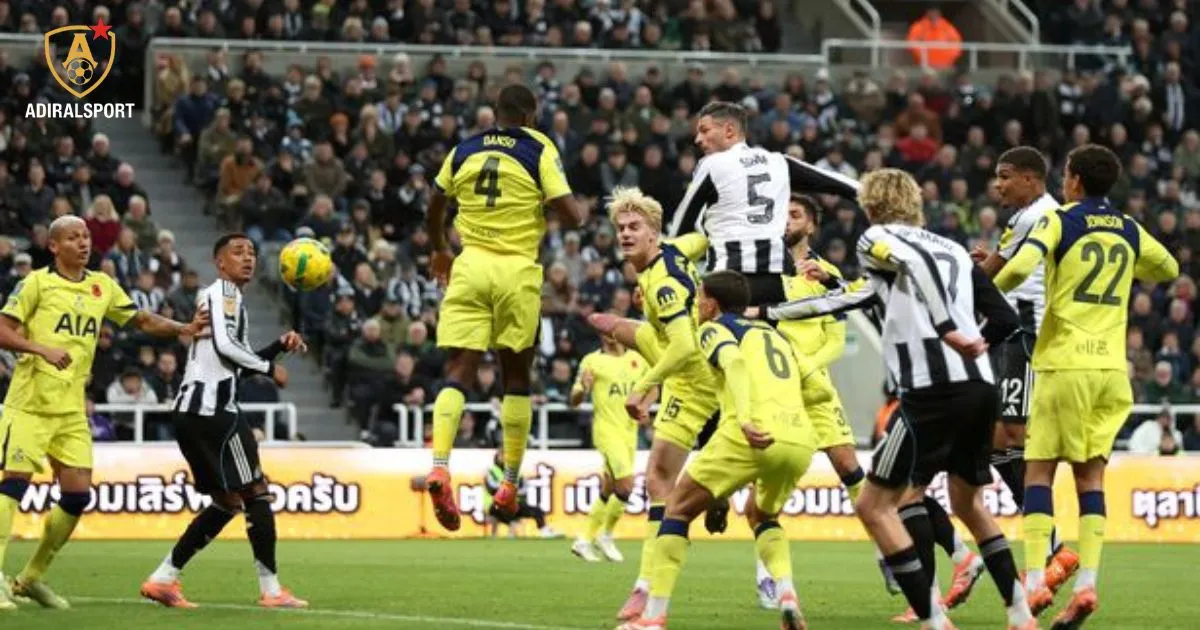
Set-Piece Supremacy: Schär’s Breakthrough
When a team is struggling to create from open play, the last thing you want is to concede from a set-piece. It feels like a self-inflicted wound. For Tottenham, this is exactly what happened, and it was a direct result of Newcastle’s tactical focus and Spurs’ defensive frailty.
- Key Points:
- In the 24th minute, Newcastle won a corner. Sandro Tonali, whose delivery was a threat all evening, whipped in a perfect, inswinging cross into the six-yard box.
- You could see the breakdown in Tottenham’s defensive structure. Fabian Schär, a known aerial threat, made a simple, intelligent run towards the front post. He wasn’t picked up effectively, and he easily rose above his marker to power a header past Kinsky.
- This moment was a microcosm of the tactical battle. It highlighted a critical weakness in Spurs’ zonal or man-marking system (or a combination of both that simply failed). For Newcastle, it was a reward for their sustained pressure and excellence in dead-ball situations. This goal is a recurring theme in any honest Tottenham vs Newcastle tactical analysis: Howe’s teams are meticulously drilled on set-plays, and it pays dividends.
Second-Half Tactical Developments and Game Management / Tottenham vs Newcastle Tactical Analysis
Coming out after halftime, you expected a response from Tottenham. Thomas Frank needed to change something, to find a way to wrestle back control. Instead, the second half began much as the first had ended, and it didn’t take long for Newcastle to land the decisive blow, a pivotal moment in this Tottenham vs Newcastle Tactical Analysis.
Woltemade’s Goal and a Goalkeeping Error
The second goal, arriving in the 57th minute, was a dagger to the heart of any potential Spurs comeback. It was a combination of slick Newcastle attacking play and a calamitous error from the Tottenham goalkeeper.
- Key Points:
- The move started with Joe Willock finding a pocket of space down the left channel. His vision was superb; instead of a drilled cross, he spotted the run of Nick Woltemade and delivered a perfectly weighted, dinked cross over the top of the Spurs defense.
- As the ball floated into the box, Tottenham’s goalkeeper, Antonin Kinsky, made a fatal miscalculation. He came charging off his line, attempting to claim a ball he was never going to reach. This decision left the goal completely exposed.
- Woltemade, keeping his composure, simply had to direct his header into the empty net. It was a gift. This moment is a critical talking point in this Tottenham vs Newcastle tactical analysis. Goalkeeping errors of that magnitude at this level are often punished, and it demonstrated Newcastle’s predatory instinct to capitalize on any mistake.
Tottenham’s Ineffective Substitutions
Faced with a two-goal deficit, Thomas Frank turned to his bench, hoping to inject some life and creativity into his team’s flagging attack. However, the changes failed to alter the tactical landscape of the match.
- Substitutions:
- Around the 65-minute mark, you saw the introduction of two of Spurs’ most dynamic players: Mohammed Kudus and Randal Kolo Muani came on for a subdued Brennan Johnson and Rodrigo Bentancur. This signaled a shift to a more attacking formation.
- Later, Mathys Tel was brought on to replace Richarlison, another roll of the dice in search of a goal.
- Tactical Impact:
- Despite the infusion of fresh attacking talent, Tottenham’s problems persisted. They remained disjointed in the final third. Newcastle, now comfortably ahead, demonstrated excellent game management. They dropped into a more compact, organized defensive block, denying Spurs the space to operate between the lines.
- The home side was content to let Tottenham have possession in non-threatening areas while remaining poised to hit on the counter. This part of the Tottenham vs Newcastle tactical analysis is telling; Spurs’ star players were unable to find a way through a defense that was now supremely confident and well-organized. The substitutions looked like a desperate measure rather than a coherent tactical switch.
Complete Match Timeline / Tottenham vs Newcastle Tactical Analysis
To fully appreciate the flow and key incidents of the game, here is a chronological breakdown of the major events. This timeline is a crucial component of a thorough Tottenham vs Newcastle Tactical Analysis.
- 24′ – GOAL: The breakthrough. Fabian Schär meets a precise Sandro Tonali corner with a powerful header, putting Newcastle ahead 1-0.
- 45+1′ – Yellow Card: Newcastle’s Malick Thiaw is shown the first yellow card of the match for a cynical foul.
- 57′ – GOAL: The crucial second. Nick Woltemade capitalizes on a goalkeeping error, heading home from a clever Joe Willock cross to make it 2-0.
- 57′ – Yellow Card: In the aftermath of the goal or a subsequent challenge, Fabian Schär receives a yellow card.
- 65′ – Substitution (Spurs): Thomas Frank makes a double change. Mohammed Kudus and Randal Kolo Muani enter the fray, replacing Brennan Johnson and Rodrigo Bentancur.
- 71′ – Substitutions (Newcastle): Eddie Howe counters with fresh legs. Joelinton and William Osula are introduced for goal-provider Joe Willock and goalscorer Nick Woltemade.
- 72′ – Substitution (Newcastle): Veteran experience is brought on as Kieran Trippier replaces Emil Krafth at right-back.
- 78′ – Substitution (Spurs): Tottenham’s final attacking change sees Mathys Tel come on for Richarlison.
- 80′ – Substitution (Newcastle): Key midfielder Bruno Guimarães replaces Jacob Ramsey to help see out the game.
- 82′ – Yellow Card: Kieran Trippier goes into the book shortly after coming on.
- 86′ – Yellow Card: Joelinton is also shown a yellow card as Newcastle look to break up play.
- 88′ – Substitution (Newcastle): The final change sees Anthony Gordon replace Anthony Elanga.
- 90+4′ – FULL TIME: The referee blows the final whistle. Newcastle United advance with a comfortable and tactically superior 2-0 victory over Tottenham Hotspur.
Statistical Deep Dive: A Tottenham vs Newcastle Tactical Analysis in Numbers / Tottenham vs Newcastle Tactical Analysis
Sometimes, the raw data can paint a picture that your eyes might miss. While statistics don’t tell the whole story, they are an indispensable tool for any in-depth Tottenham vs Newcastle Tactical Analysis. They can confirm tactical dominance and highlight hidden efficiencies.
| Statistic | Newcastle United | Tottenham Hotspur |
| Possession | 47% | 53% |
| Expected Goals (xG) | 1.31 | 0.67 |
| Total Shots | 10 | 11 |
| Shots on Target | 3 | 6 |
| Corners | 4+ (unspecified total) | Not specified |
| Fouls | Not specified | Not specified |
| Yellow Cards | 4 | 0 |
(Statistics sourced from multiple reports)
Let’s break down what these numbers mean for you. At first glance, you might see that Tottenham had more possession (53%) and more shots on target (6) and wonder how they lost. This is where a more sophisticated Tottenham vs Newcastle tactical analysis comes in.
The most telling statistic here is the Expected Goals (xG). Newcastle’s xG of 1.31 compared to Tottenham’s 0.67 reveals that the home side created significantly higher quality chances. Spurs may have had shots, but they were likely low-probability efforts from distance or tight angles. Newcastle, despite having fewer shots on target, created opportunities that, on average, should have resulted in more goals. This confirms what we saw: Newcastle were far more effective and clinical in the final third, while Tottenham’s possession was largely sterile and non-threatening.
Conclusion: A Tactical Masterclass from Howe and a Night to Forget for Frank / Tottenham vs Newcastle Tactical Analysis
When you boil it all down, this Tottenham vs Newcastle tactical analysis reveals a comprehensive and deserved victory for Eddie Howe’s side. It was a win born from a clear, well-executed tactical plan. The strategy to press high, disrupt Tottenham’s build-up, and capitalize on set-piece situations was implemented flawlessly from the start. Newcastle played with an intensity and coherence that their opponents simply could not match.
For Thomas Frank and Tottenham, this was a night that exposed significant tactical deficiencies. They appeared reactive, disjointed, and fragile under pressure. The inability to play through Newcastle’s press and the costly individual errors that led to both goals will be major points of concern. For Newcastle, the dream of defending their EFL Cup title marches on, fueled by a performance that builds confidence and momentum. For Tottenham, it’s an early exit from a cup competition and a harsh return to the drawing board.
This match served as a stark reminder of the tactical work required, especially with a squad already stretched by injuries. The final whistle didn’t just signal the end of a match, but the confirmation of a tactical lesson delivered.
FAQ: Your Questions on the Tottenham vs Newcastle Tactical Analysis
What was the main reason for Tottenham’s loss in this Tottenham vs Newcastle tactical analysis?
When you dig into the core of this Tottenham vs Newcastle tactical analysis, the primary reason for the loss was twofold. Firstly, they were tactically unprepared for the ferocity of Newcastle’s high press in the opening half-hour. This prevented them from establishing any control. Secondly, their defeat was cemented by critical individual errors. The lapse in concentration for the first goal from a corner and the glaring goalkeeping misjudgment for the second were moments you simply cannot afford in a knockout game. A complete Tottenham vs Newcastle tactical analysis must conclude that it was this combination of systemic tactical failure and individual mistakes that sealed their fate.
How did Newcastle’s formation contribute to their win in this EFL Cup match?
Newcastle’s 4-3-3 formation was absolutely instrumental to their victory. It provided the perfect framework for their aggressive strategy. It allowed their front three to press Tottenham’s backline in a coordinated manner, while the energetic midfield trio, masterfully conducted by Sandro Tonali, comprehensively won the battle in the center of the park. This midfield dominance was key; it broke up Spurs’ play and served as the launching pad for Newcastle’s own attacks. The success of this formation is a cornerstone of this Tottenham vs Newcastle tactical analysis.
Were there any standout player performances in this Tottenham vs Newcastle tactical analysis?
Absolutely. For Newcastle, Sandro Tonali was the conductor of the orchestra in midfield. He controlled the tempo, his set-piece delivery was impeccable (as shown by his assist), and his defensive work rate was immense. Nick Woltemade also deserves immense credit; he led the line intelligently, linked play effectively, and scored the crucial second goal. For Tottenham, it was a challenging evening where few players managed to impose themselves on the game, making it difficult to single out any positive standout performances in this Tottenham vs Newcastle tactical analysis.
What does this result mean for both teams’ seasons going forward?
For Newcastle, this is a significant psychological and practical boost. It keeps them firmly in the hunt to defend their EFL Cup trophy and reinforces the belief in their manager’s tactical approach. It’s a result that builds serious momentum. For Tottenham, this loss is a sobering blow. It highlights a potential lack of squad depth to compete on multiple fronts, especially with their current injury situation. This Tottenham vs Newcastle tactical analysis serves as a clear warning sign, exposing frailties that opponents will now look to exploit and putting pressure on Thomas Frank to find tactical solutions quickly.